 |
SWING
|
A Winter Workbench
Idea.
The idea of a portable workbench came when it was evident that it was
necessary, due to baby-sitting duties, for me to work in the house
instead of the garage where the layout was located. The most likely
location was the kitchen table but this was going to be a challenge as
it was already a storage space for everything that went into the house
plus groceries, clothing, books, paperwork, and, very occasionally was
actually used for the purpose for which it was designed----eating meals.
However---if I could push everything to one end (as opposed to putting
everything away) I thought that I could just about use a small area for
more important things, like modelling. But the dangers of leaving tools
and materials unattended there for to long were so great that the only
option was to be able to use or pack away at short notice. Enter the
idea of a small(ish) bench on which I could model almost everything
except the baseboards and fixed items. Something which could hold all
those small bits and bobs and tools without the risk of them always
disappearing or suffering damage and which could be easily moved from
kitchen to garage or even into he car and down to the clubroom where
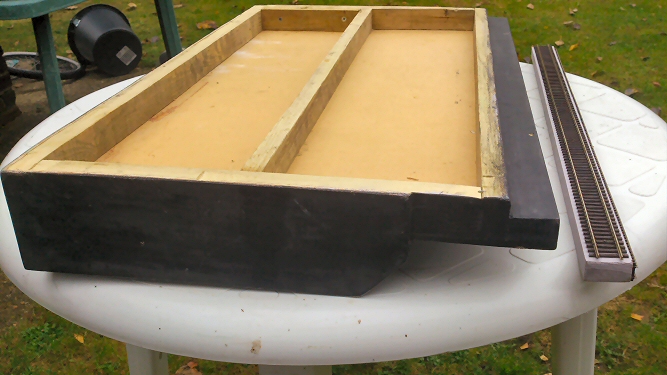
work in progress could be continued. Construction.
I have also made up test tracks for both (OO)16.5mm and (N)9mm by pinning lengths of track to two faces of a piece of 4 x 2.5cm sawn softwood, which I cut to fit between the plywood sides of the unit, then painted in grey primer. This test track is removable and simply turned to present the gauge required.
Usage.
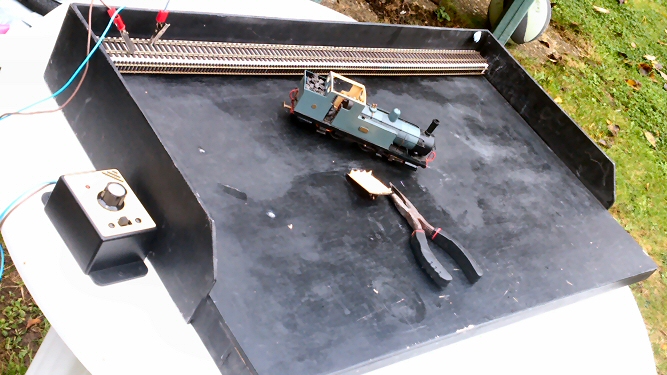
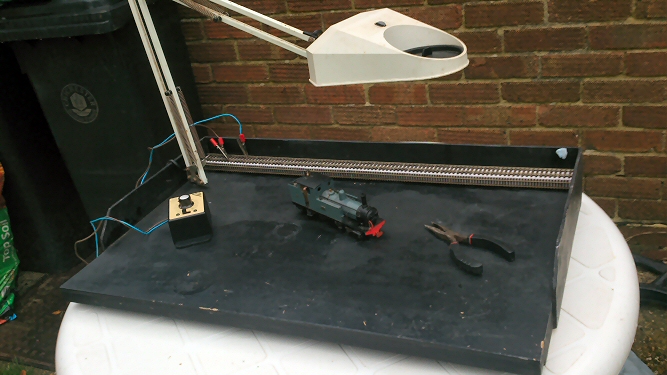
The workdesk has already proven itself to be a very useful addition to my ‘toolbox’ and I have used it on several occasions both indoors and in the garage and at the clubrooms of Bognor Regis MRC. My plan was to equip it with all sorts of gadgets but have decided so far that all I need on it are a good light with a magnifying glass attached. I use an old anglepoise type which is temporarily fitted by inserting the base pin through a tight fitting hole near the back of the baseboard. If you prefer, you can easily use a clamp type flexible lamp/magnifier fixed to the worktop lip. I sometimes require a small vice and clamp one to the front lip of the desk. Depending what project I may be working on I keep in my toolbox a number of wires with either crocodile clips, washers or light bulbs attached to connect to a separate controller for testing loco’s etcetera. I always keep a cutting board handy and several small empty yoghurt pots or butter dishes for small items which would otherwise get mislaid
I hope the photos are able to speak a thousand words and show what I have attempted to explain.
NOTE: This article can also be found at http://brmrc.co.uk/winter_workdesk.php